How to Fix an InSinkErator Disposal That Won't Turn On
If your insinkerator garbage disposal not working and it won’t power up, the fix is often simpler than you expect. Most “dead” disposals come down to power, a tripped reset, or a jammed flywheel. Work through the steps below in order so you free the unit safely and without damaging the motor or blades.
For more help, see our InSinkErator Garbage Disposal Not Working: Fix Every Cause guide.
Start with the safest, fastest checks
Confirm the disposal has power
Start at the easiest source: power. If the disposal truly has no electricity, you don’t want to move on to jam-clearing or wiring checks.
- Turn the disposal wall switch (if present) to OFF.
- Plug in a known-working lamp or phone charger at the same under-sink outlet (or use a non-contact voltage tester at the switch).
- Turn the switch to ON and confirm you get power to the switch/disposal area.
If other devices on the same circuit are also dead, you’re dealing with breaker or circuit issues, not the disposal itself.
Check the wall switch, air switch, or breaker
Next, confirm the control path that tells the disposal to run. Many “won’t turn on” situations are caused by a failed switch connection or a tripped breaker.
- If you use a wall switch, flip it OFF then ON firmly.
- If you use an air switch, press the button and listen/feel for actuation; a stuck or failed air switch won’t send power to the unit.
- Check the breaker panel: locate the circuit labeled for the kitchen/disposal, and reset it fully OFF then ON.
If the switch/breaker is correct but the disposal still won’t start, move to the overload reset.
Look for a tripped overload protector and reset it
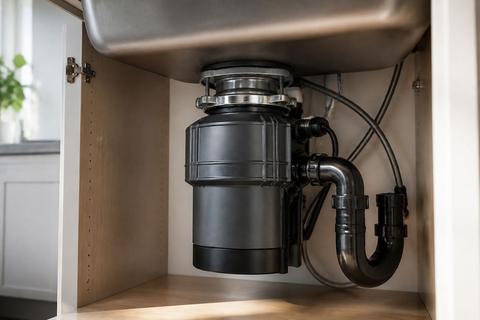
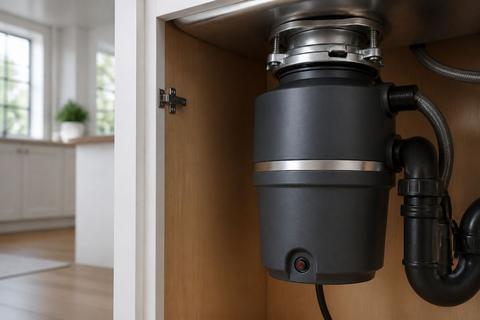
InSinkErator disposals include a red overload reset button on the bottom of the unit. When the motor overloads (often from a jam or heavy strain), it trips and shuts the unit down.
- Turn OFF power at the wall switch and/or breaker.
- Locate the red reset button on the underside.
- Press the reset button in firmly until it clicks and stays in.
- Restore power and test by turning the switch ON briefly.
If the reset pops back out immediately, wait about 10 minutes for the motor to cool, then press it again. If it trips again, you likely have a jam or overload.
Rule out a simple jam or clog
Listen for humming, then shut power off
A disposal that hums but doesn’t turn on almost always has a jammed flywheel, not a dead motor. The motor is trying to rotate but is blocked.
- Turn OFF power at the wall switch and/or breaker before touching anything.
- If you heard humming, that confirms the electrical side is likely working.
- Clear the obstruction safely using the factory wrench method (below).
Do not put your hand inside the grind chamber. Use tools and keep power off while working.
Use the hex wrench and reset button correctly
Every InSinkErator ships with a 1/4-inch hex “Jam-Buster” wrench designed for freeing the impellers/flywheel without damaging internal parts.
- With power OFF, insert the hex wrench into the hex socket in the center of the disposal’s underside.
- Work the wrench back and forth until it turns a full revolution.
- Remove the wrench carefully.
- Press the red reset button (bottom) until it clicks and stays in.
- Restore power and test.
If the wrench will not rotate, stop forcing it and reassess for severe jams or seized components.
Clear a jam without damaging the motor or blades
To avoid damage, remove obstructions only by approved methods and avoid bending/striking internal parts.
- Use tongs to lift visible objects only after power is OFF (never use your bare hand).
- If you find a stuck item, free it with the hex wrench first, then remove it with tongs.
- After clearing, press the red reset button once before restoring power.
If water is present, clean it up and let the unit dry before testing again. Persistent jams usually mean something is trapped deep inside or the flywheel is failing to rotate smoothly.
Check the outlet, plug, and wiring path
Verify the disposal is plugged in and the outlet works
Some models plug into an outlet under the sink, and a loose plug or dead outlet will make the disposal appear completely dead.
- Check whether your InSinkErator has a visible cord and plug under the sink.
- Push the plug firmly into the outlet.
- Plug in a known-working device at that outlet to confirm the outlet has power.
If the outlet is dead, you may have a tripped GFCI, a loose connection, or a breaker issue—address that before blaming the disposal.
Inspect the cord, switch wiring, and under-sink connections
If power exists at the outlet/breaker but the disposal still won’t run, inspect the path between the switch and the disposal.
- Unplug power at the breaker.
- Inspect the disposal power cord for cuts, looseness, or a damaged strain relief.
- Check switch wiring at accessible connections (where your system allows access).
- Confirm under-sink connections aren’t loose or corroded.
If you see damaged insulation or burn marks, stop and move to an electrician. Improper wiring repair can create a shock or fire risk.
Know when a wiring issue needs an electrician
Wiring faults are the line between a quick reset/jam fix and a safety hazard. Call a licensed electrician when you find unsafe conditions or cannot access wiring safely.
- Stop troubleshooting if you see scorch marks, melted connectors, or exposed conductors.
- Call an electrician if breakers trip immediately after resetting.
- Get help if you cannot confidently trace switch wiring or outlet supply.
Because disposals use wet-location electrical components, wiring issues deserve professional attention.
Inspect the sink and disposal components
Test the stopper, splash guard, and mounting assembly
Not turning on isn’t always the motor—sometimes the sink hardware interferes with the grind chamber or the unit’s alignment.
- Check that the sink stopper isn’t jammed into the drain opening.
- Inspect the splash guard/insinkerator cover area for improper seating or misalignment.
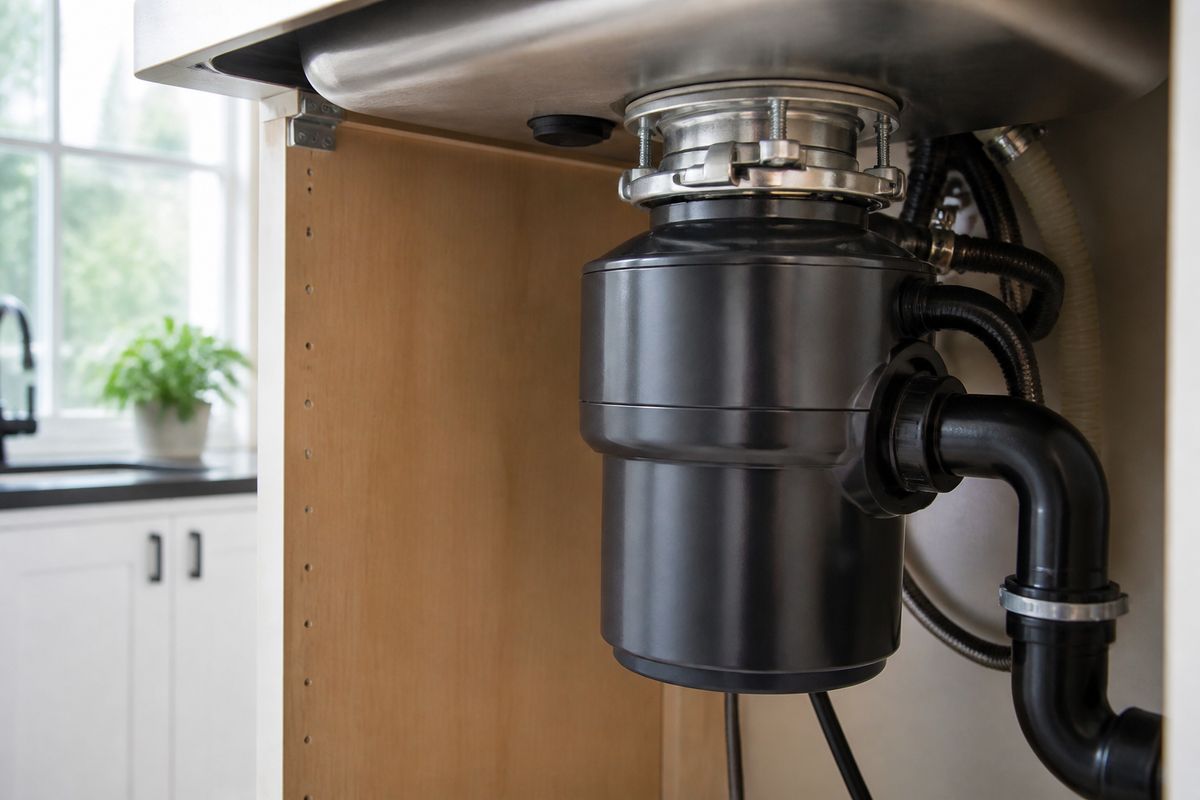
- Confirm the disposal is properly mounted and secured at the mounting assembly under the sink.
A loose or misaligned unit can cause binding, leaks, or failures to operate smoothly.
Look for leaks, corrosion, or stuck internal parts
Leaks and corrosion can indicate failed seals or internal wear that prevents reliable operation.
- Diagnose leak location by where water appears:
- Water at the top: sink flange may need re-seating.
- Side leaks: dishwasher hose clamp/discharge tube gasket issues.
- Bottom vent holes: internal seal failure.
- Look for corrosion around the grind chamber and connections.
- If the unit leaks from the bottom vent holes, replacement is usually required.
If internal parts are seized, forcing operation can worsen damage.
Decide whether a gasket, switch kit, or controller is failing
When power and jams are ruled out, component failure becomes more likely: a failed switch, a failing controller, or a degraded gasket can stop operation.
- If your unit uses an air switch, the switch kit may fail even when power is present.
- If you have consistent no-start behavior with no electrical anomalies found, suspect the control module/switch mechanism.
- If leaks are active and seals are compromised, replace the failed seal components—or replace the disposal when the internal seal has failed.
For the most accurate decision, match troubleshooting to your exact model number (next section).
Know when the problem is more than a reset
Differentiate a dead motor from a jammed or overloaded unit
The fastest distinction: humming vs silent behavior. A hum means the motor has power and is trying to turn but is blocked.
- If you hear humming but no grinding, treat it as a jam/overload: shut power off, free the flywheel with the hex wrench from below, remove the object with tongs, then press the red reset button.
- If there is no sound at all after power/reset checks, the motor may be dead or the electrical path may still be wrong.
- If the unit trips the reset repeatedly, you’re likely dealing with a jam, overload condition, or an electrical fault.
This prevents you from replacing parts unnecessarily.
Signs the disposal needs repair or replacement
Several clear signs point beyond a simple fix.
- Major leaks, especially from the bottom vent holes (internal seal failure).
- Severe corrosion around mounting points or the grind chamber.
- Repeated overload trips even after clearing obvious jams.
- Performance failure that worsens—grinding slows, stalls, or struggles with normal loads.
If you must keep resetting to get operation, repair may be incomplete without addressing the root cause, and replacement often becomes the more reliable path.
When a newer model or higher-horsepower unit makes sense
Replacing is sometimes the best solution for performance and longevity, especially when the current unit can’t handle your household’s usage.
- If your unit is older and underpowered for your kitchen’s waste load, upgrading reduces strain that leads to overloads.
- If the unit is in poor condition (corrosion/leaks) and keeps failing, a new unit prevents repeated downtime.
- Newer units also incorporate improved insulation and grinding features.
Two main lines are Badger (builder-grade; often replaced rather than repaired internally) and Evolution (Excel/Compact/Supreme, with enhanced multi-stage grinding and SoundSeal insulation). Model matching is key for the right replacement.
Prevent repeat failures after the fix
Clean the disposal correctly and keep it odor-free
After you get the disposal working again, prevent the buildup that creates clogs and odors.
- Run cold water while the disposal runs to flush food particles.
- Use ice cubes and a small amount of rock salt (sparingly) to help scrub buildup and freshen the chamber.
- Avoid pouring grease, heavy fats, or cooking oils down the drain.
For odor, periodic cleaning and cold-water flushing keep residue from accumulating.
Use the unit properly to avoid future jams
Most repeat jams come from wrong materials and overloaded cycles.
- Turn on water before switching the disposal ON.
- Feed small batches of food waste, not large continuous loads.
- Avoid fibrous items and hard non-food items that cause binding (e.g., bones, large pits, stringy vegetables, and glass).
If you’re clearing frequent jams, change what you feed it—not just how you reset it.
Maintenance tips for quiet, long-lasting operation
A few habits keep the unit running smoothly and reduce strain on the motor.
- Use cold water during operation; it helps solid waste move through.
- After grinding, let the disposal run with water for a short extra burst to clear debris.
- Periodically check under-sink mounting for looseness and inspect for early signs of leaks.
Quiet, smooth grinding with consistent rotation means the jam-free condition has been maintained.
Find the right support, parts, and documentation
Use the model number to find the correct manual and parts
The safest way to get the right troubleshooting steps and replacement components is to use your exact model number.
- Locate the model/spec label on the disposal unit (usually on the side or underside near the mounting area).
- Match the manual to your exact model number.
- Order only compatible parts listed for that model (reset button, switch kit, mounting components).
Using the wrong parts wastes time and can cause additional damage.
Understand warranty coverage and registration
Before paying for repairs, check what your disposal is covered for.
- Find your purchase date and warranty period details in your documentation.
- If you registered the product, confirm the registration status.
- Understand whether coverage includes electrical components and labor or only parts.
Warranty terms vary by model and installation conditions, so rely on the manufacturer documentation for accuracy.
Where to source replacement parts or a new InSinkErator model
When you need parts or decide to replace the disposal, source from reliable providers.
- Use OEM replacement parts listed for your disposal’s model number.
- Compare the required specs for a replacement unit: mounting type, horsepower, and electrical/control compatibility.
- If you’re replacing, ensure the new unit is designed to match your existing sink drain and dishwasher hookup configuration.
Getting the right match reduces installation friction and prevents repeated operational failures.
Frequently Asked Questions
Why is my InSinkErator garbage disposal not working at all?
The most common causes are no power, a tripped reset switch, a jam, a bad wall switch, or a failed outlet or wiring connection. Start with power and reset checks before opening anything. Then listen for any signs of life (like humming) to quickly separate electrical issues from mechanical jams.
Why does my InSinkErator just hum but not turn on?
A humming disposal usually has power but the motor is stuck by a jam or overload. Turn off power before using the hex wrench or reset button. Free the jam from the underside with the correct Jam-Buster wrench method, then press the red reset button before restoring power.
How do I reset an InSinkErator garbage disposal?
Turn off the disposal, press the red reset button under the unit, then restore power and test it. If it trips again immediately, there is likely a jam, overload condition, or electrical issue that needs attention before you can run it normally.
Can I fix a jammed InSinkErator myself?
Often yes, if the problem is a simple jam and you can safely cut power first. Use the manufacturer-approved method to free the impellers and avoid putting your hand inside. Insert the included 1/4-inch hex Jam-Buster wrench into the underside socket and work it back and forth until it turns a full revolution.
How do I know if the disposal needs replacement instead of repair?
If the motor is dead, the unit trips repeatedly, has major leaks, severe corrosion, or is older and underpowered for your household, replacement is often the better option. If leaks come from the bottom vent holes, internal seal failure typically makes replacement the reliable long-term fix.