How to Unclog a Window AC Drain Line
A window AC can drain condensate efficiently—until a window ac drain line clogged condition traps water and forces it indoors. If you’ve noticed puddles, damp carpeting, or a musty smell while the unit still runs, the drain path is the first place to look. With the right prep and a careful clean, you can clear buildup without damaging the unit.
For more help, see our Window AC Water Problems: Leaks, Drips, and Drain Fixes guide.
What the Drain Line Does and Why It Clogs
The drain line carries condensate created by the evaporator out of the unit so water drips outside rather than collecting indoors. When air, moisture, and dust combine over time, the drain path becomes a paste-like mixture that blocks flow.
How condensate should flow out of a window AC
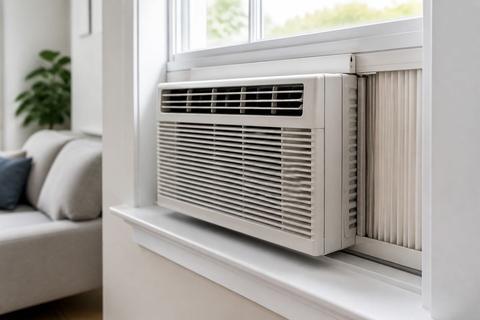
A correctly installed window unit tilts slightly toward the outside (about 1/4 to 1/2 inch). Condensate runs from the evaporator into the drain pan, then out through the drain hole/line so it can exit outdoors. On many window ACs there’s no dedicated “drain plug”; instead, the system is designed so pan water is managed and can be splashed/evaporated in normal operation. You should see water discharge outside and avoid steady dripping indoors.
Common causes of a clogged drain line
The most common buildup is condensate mixed with dust and lint from the intake filter area. Slime forms when microbial growth coats wet surfaces, narrowing the opening. A partially blocked drain can also happen when the unit’s tilt is wrong, so water overflows the pan path and never reaches the drain. Less obvious causes include a misaligned drain tube, debris entering through the grille, or seasonal neglect that lets residue harden.
Signs the drain path is blocked
Look for water dripping inside, dampness under the unit, or pooled water near the window track. You may also notice musty odors from standing moisture, slower drainage, or gurgling sounds that suggest trapped water. If the fan runs but water won’t exit outdoors, the drain hole/line is likely restricted. In some cases, the unit can cycle abnormally because excess moisture interferes with normal condensate handling.
Safety and Prep Before You Start
Before you touch the drain area, make it safe to handle. Window ACs use electrical power, and clogged areas can be messy with slime and water.
Power down and unplug the unit
- Turn the AC off.
- Unplug the unit from the wall outlet.
If your window AC uses a UL-listed LCDI safety cord (with TEST and RESET buttons), do not bypass it. If the cord is already tripped, press RESET firmly until it clicks, then leave the unit unplugged until you’re ready to reconnect.
Gather the right tools and cleaners
Use tools that physically remove buildup without forcing debris deeper:
- A flexible wire (straightened hanger works) or a small zip tie for gentle scraping
- A soft brush (to loosen slime)
- Warm water in a small container
- A wet/dry vacuum with a hose attachment
- Towels and a bucket for runoff
For cleaning, use a mild cleaner (not harsh chemicals) if you see heavy slime or mildew.
Protect the room from drips and debris
Lay towels or a plastic sheet under the front of the unit and around the side rails. Place a bucket or wide pan near the drain access area so water doesn’t soak floors. Keep a trash bag handy for filter or debris removal. If you’re using warm water, control the pour rate so it flushes out the clog rather than flooding the interior.
How to Clear a Window AC Drain Line
Clearing the drain line is a mix of mechanical removal and controlled flushing. Work from access to blockage, then remove loosened material using suction.
Find the drain opening and access points
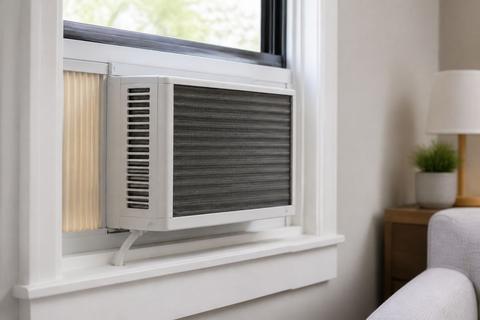
- Remove the front grille/filter panel so you can see where the evaporator and drain pan area sit behind it.
- Locate the drain opening or drain tube exit point near the bottom area of the unit (often at the pan’s outlet).
If your unit has a removable side cover or drain access port, use that rather than forcing tools through gaps. Keep tools short enough to avoid puncturing coils or damaging plastic drain channels.
Use a wire, zip tie, or soft brush to remove buildup
- Insert a flexible wire, zip tie, or brush into the drain opening.
- Break up the blockage with gentle forward/back motion.
Stop if resistance becomes extreme—don’t spear into the pan or coil. Pull debris out as you go so you’re removing material, not compressing it deeper.
Flush the line with warm water
- Pour warm water into the drain area slowly so it can flow through.
- Observe where the water exits outside the unit.
If water still backs up indoors, you have either a persistent clog or a blockage further down the drain path. Repeat the mechanical step, then flush again.
Use a wet/dry vacuum to pull out the clog
- Set a wet/dry vacuum to suction mode and attach the hose.
- Place the hose snugly near the drain opening (a towel can help form a seal).
- Run suction briefly and monitor debris coming out.
This method pulls loose sludge out of the line when flushing doesn’t fully clear it.
When to use a mild cleaning solution
Use mild cleaner only when you see slime/mildew that a wire can’t fully remove.
- Mix a mild cleaner with water per the label directions.
- Apply it to the drain opening and the surrounding drain-pan area.
- Let it sit briefly, then flush with warm water and re-suction with the wet/dry vacuum.
Avoid bleach or harsh solvents—residue and damage to plastics/coatings can make the problem worse later.
When the Drain Pan or Coil Is the Real Problem
Sometimes the drain line isn’t the issue—standing water is caused by the pan, coil, or installation angle. Address these before forcing tools deeper.
Check the drip pan for slime, rust, or standing water
Remove any front cover needed to view the drain pan area. Look for slimy residue, rust, or water that won’t drain. If you find standing water, clean the pan outlet and remove buildup at the drain hole using a brush and gentle scraping. Standing water in the pan indicates the drainage path is obstructed or the unit tilt is wrong.
Clean the evaporator coil and surrounding area
If condensate can’t properly drain because the coil is dirty or coated, moisture management fails. Remove the filter, then inspect the evaporator coil for heavy dust. Clean with coil-safe methods: use a soft brush to clear dust and follow any manufacturer guidance for coil cleaning if included. Keep water application controlled so you don’t flood electrical components.
Inspect the tilt and installation angle
Condensate must drain outward. Confirm the unit tilts toward the outside by checking the gap at the bottom front vs. outside side. If the unit is level or tilted inward, reposition the window AC using the manufacturer’s recommended shims/positioning. Correct tilt is a direct fix for indoor dripping when the drain opening is otherwise clear.
Prevent Future Clogs
After you clear the line, prevention matters because the same dust-and-moisture cycle restarts quickly. A short routine reduces slime buildup and slow drainage.
Set a seasonal cleaning routine
Check the drain path at the start of cooling season, then again mid-season or whenever you notice slow drainage, odors, or indoor dripping. At minimum, rinse and clean the filter regularly so less dust reaches the evaporator and drain area. If you live in a humid environment, increase attention to musty smells and pan residue.
Keep dust and mold from entering the drain path
A dirty filter is the biggest entry point for dust-lint mixture. Clean the filter and make sure it seats tightly so air doesn’t bypass it. During storage, cover the unit to reduce debris and moisture exposure inside the cabinet. If you see early signs of slime around the drain opening, clean promptly before buildup hardens.
Improve drainage with proper unit positioning
Maintain the correct outward tilt (about 1/4 to 1/2 inch). Recheck after moving the unit or after seasonal window adjustments. Ensure the unit isn’t blocked by curtains or debris that can trap moisture at the lower edge and interfere with outdoor discharge.
When to Replace Parts or Call for Help
If the drain line is clear and water still leaks, a damaged pan or drain tube may be the root cause. Some problems require service because they involve sealed components or structural parts.
Warning signs of a cracked pan or damaged drain tube
Replace or repair parts if you see a cracked drain pan, a split/warped drain tube, or brittle plastic channels that won’t hold proper flow. Also look for persistent rust spots, repeated interior flooding after tilt correction, or water pooling in the same area every run. If the pan outlet is physically damaged, unclogging alone won’t solve it.
When the unit may need professional service
Call for professional service if you encounter repeated freezing on the evaporator followed by continued drainage failures, or if your unit shows error codes related to sensors or refrigerant detection. If your display shows a code (for example, some brands use codes like E1 or EC for sensor/refrigerant-related detection), match it to your manual and don’t guess.
What not to do with refrigerant or sealed components
Do not open the sealed cooling system to “access” the drain or troubleshoot refrigerant. Draining-line cleaning is separate from refrigerant service. Also do not use harsh chemicals that can damage coatings or leave residue inside the drain path. Keep the work limited to drain access, pan cleaning, coil/filter area cleaning, and safe flushing/suction.
Frequently Asked Questions
Why is my window AC leaking water inside even when it still cools?
A window ac drain line clogged condition can trap condensate, and a blocked drain pan outlet can do the same. Improper tilt also forces water to overflow the pan path and drip into the room. If the unit cools normally but water collects indoors, clear the drain path and verify the outward tilt first.
Can I use vinegar or bleach to clean a window AC drain line?
A mild cleaner can help with slime and mildew, and vinegar is sometimes used for light buildup on drain areas. Avoid bleach and harsh chemicals—they can damage internal parts, degrade plastic/coatings, or leave residue that contributes to future clogs. Stick to gentle cleaners and follow up with warm water flushing.
How often should I clean the drain line on a window AC?
Check the drain line at the start of the cooling season, then again if you notice slow drainage, musty odors, or water dripping inside. Keeping the filter clean reduces how quickly condensate becomes sludge. If your unit runs daily in humid weather, plan for more frequent inspection.
Do I need to remove refrigerant to unclog the drain line?
No. Unclogging the drain line is separate from refrigerant service. You should not open sealed refrigeration components or remove refrigerant for a drain issue; instead, clear buildup through the drain access opening, then flush and suction as needed.