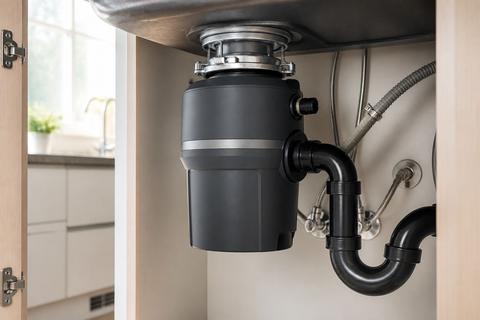
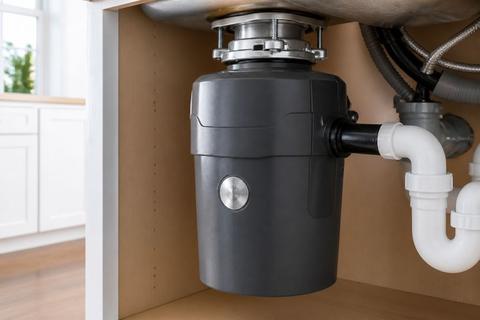
How to Install a Garbage Disposal
If your sink drains slowly or food scraps are piling up, learning how to install a garbage disposal can save you time and keep your kitchen cleaner. The job is straightforward when you match the unit to your sink, follow the electrical shutoff steps, and get the mounting seal right. Use the steps below to replace or install a new disposal with confidence.
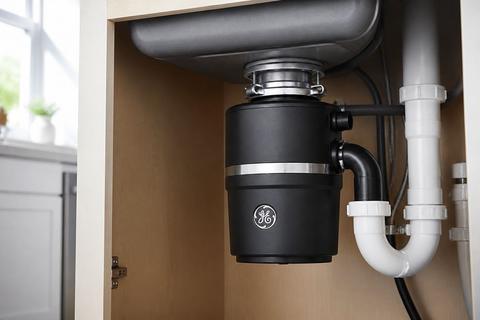
For more help, see our GE Garbage Disposal Installation: Removal, Wiring, and Setup guide.
What to Know Before You Start
Check sink compatibility and disposal size
Before you buy parts or begin work, confirm your sink opening and existing plumbing layout can support the disposal. Measure the sink’s mounting hole (most kitchens use the standard 3-bolt system with a disposal flange), and check whether you need a continuous-feed disposal (runs from the wall switch) or a batch-feed model (runs only when a stopper is inserted into the sink opening and twisted). If replacing, check the discharge direction—many under-sink drain pipes and disposal discharge tubes must align without excessive bends. Also confirm the disposer’s horsepower/size fits your needs and that the unit you’re installing uses the same mounting type as your sink.
Gather the right tools and parts
Collect tools and materials so you don’t stop mid-job. Common items include a screwdriver, adjustable wrench, channel-lock pliers, plumber’s putty, a bucket, shop rags, and a flashlight. If you’re replacing an old unit, you may need a hammer and chisel to remove stuck fittings. For electrical work, have wire nuts (or the disposal’s included connectors), electrical tape, and a voltage tester. Some disposals use an Allen wrench for jams; keep the manufacturer’s wrench or an appropriate 1/4-inch hex (Allen) handy. Also plan for new gaskets and mounting hardware—many kits include a new flange gasket and mounting ring.
Turn off power and prepare the workspace
Start with safety: turn off the disposal’s breaker at the electrical panel. If you’re not sure which breaker controls it, switch off the main breaker and verify with a voltage tester at the disposal wiring. Unplugging may not be possible if the unit is hardwired. Clear everything under the sink and place a bucket under the P-trap area to catch residual water. Lay down rags to keep debris off the floor and keep sharp tools contained. Once power is off, move ahead with removing the old unit or installing the new mounting parts.
Remove the Old Disposal Safely
Disconnect the electrical and drain lines
With the breaker off, disconnect power first. If the disposal has a plug-in cord, unplug it from the outlet under the sink. For hardwired units, remove the electrical cover plate and disconnect the wire leads using the approved method (typically removing wirenuts and separating hot/neutral/ground). Next, disconnect the drain plumbing: loosen the slip nuts on the P-trap and the tailpiece connection, then lower the trap assembly carefully. Remove any dishwasher drain connection if present. Finally, support the disposal with one hand while you loosen discharge plumbing connections so the unit doesn’t drop and strain wires or fittings.
Support and detach the unit from the sink flange
Most disposals mount with a locking ring between the disposal and the sink flange. Support the disposal’s weight, then locate the mounting bracket and release mechanism (often a twist/lock). Use a screwdriver to loosen the bracket screws or rotate the locking ring as the manufacturer specifies. Once the unit releases, lower it carefully and set it aside. Keep the sink flange and mounting components intact for now—later you’ll remove what needs replacing and clean the mounting area. If the mounting ring is stuck, loosen it gradually while keeping the disposal supported to prevent damage to the sink.
Clean the mounting area and inspect for damage
After the disposal is removed, clean the sink flange and countertop area thoroughly. Scrape off old plumber’s putty or gasket material so the new flange gasket can seat flat and seal evenly. Inspect the sink flange for warping, cracks, or signs of previous leaks around the mounting bolts. Check the drain opening area for residue that could prevent a watertight seal. If the sink metal is damaged or the flange doesn’t sit level, fix those issues before installing the new mounting assembly—most disposal leaks trace back to a bad or uneven flange surface.
Install the New Mounting Assembly
Assemble the sink flange and mounting ring
Install the new sink flange and mounting hardware using the kit included with your disposal. Start by placing the flange gasket into the underside flange area as directed. Apply plumber’s putty where required—some kits specify putty only for certain seals, while others use a gasket only. Position the mounting ring/bottom snap ring or bracket under the sink so it matches the flange and holes. Tighten screws evenly so the flange sits centered over the drain opening. If your kit includes alignment tabs or a specific orientation, follow it exactly to ensure the disposal locks correctly later.
Seal the flange and tighten evenly
A proper seal prevents sink leaks and reduces vibration noise. Apply the specified sealant or putty only where the kit instructs, then align the mounting components and begin tightening the mounting ring screws. Tighten alternately (top-left, bottom-right, etc.) to keep pressure even and prevent rocking. Stop when the flange is secure and the gasket compresses uniformly—don’t overtighten to the point that the flange shifts or the gasket extrudes excessively. Wipe away any excess putty immediately so it doesn’t interfere with the disposal’s mounting surface. This even tightening step is one of the biggest factors in leak-free operation.
Verify the gasket is seated correctly
Before you hang the disposal, verify the flange gasket seats in the correct groove and remains flat. From under the sink, check that the gasket edge is continuous around the opening and not pinched or twisted. If the gasket appears uneven, loosen the mounting ring screws slightly, realign the gasket, and tighten evenly again. Make sure the drain opening is unobstructed and that the flange sits flush against the underside of the sink. This prevents water from working its way out around the mounting seam after installation and during regular use.
Connect the Disposal and Drain
Hang the unit on the mounting ring
With the power still off, connect the disposal to the mounting assembly. Lift the disposal and align the inlet/discharge orientation with the drain pipe path so the discharge tube can connect without kinks. Position the disposal so the mounting ring locks into place—listen for a firm engagement or follow the manufacturer’s lock mechanism. Ensure the unit sits level and doesn’t shift when you gently try to move it. The dishwasher inlet and discharge connection should be accessible for the next steps. Avoid forcing the fit; if it doesn’t lock easily, reposition the disposal or check the mounting ring alignment.
Attach the dishwasher inlet if needed
If you have a dishwasher, connect the drain line to the disposal. Look for the dishwasher inlet nipple and remove the knockout plug inside the inlet before connecting—use a screwdriver to punch out the plug from within the grind chamber, then pull the loosened plug free. If you skip this, the dishwasher will not drain properly and will back up into the sink. After removing the plug, attach the dishwasher hose using the provided clamp or fitting. Route the hose without sharp bends and ensure the connection is tight and centered to avoid leaks at the joint.
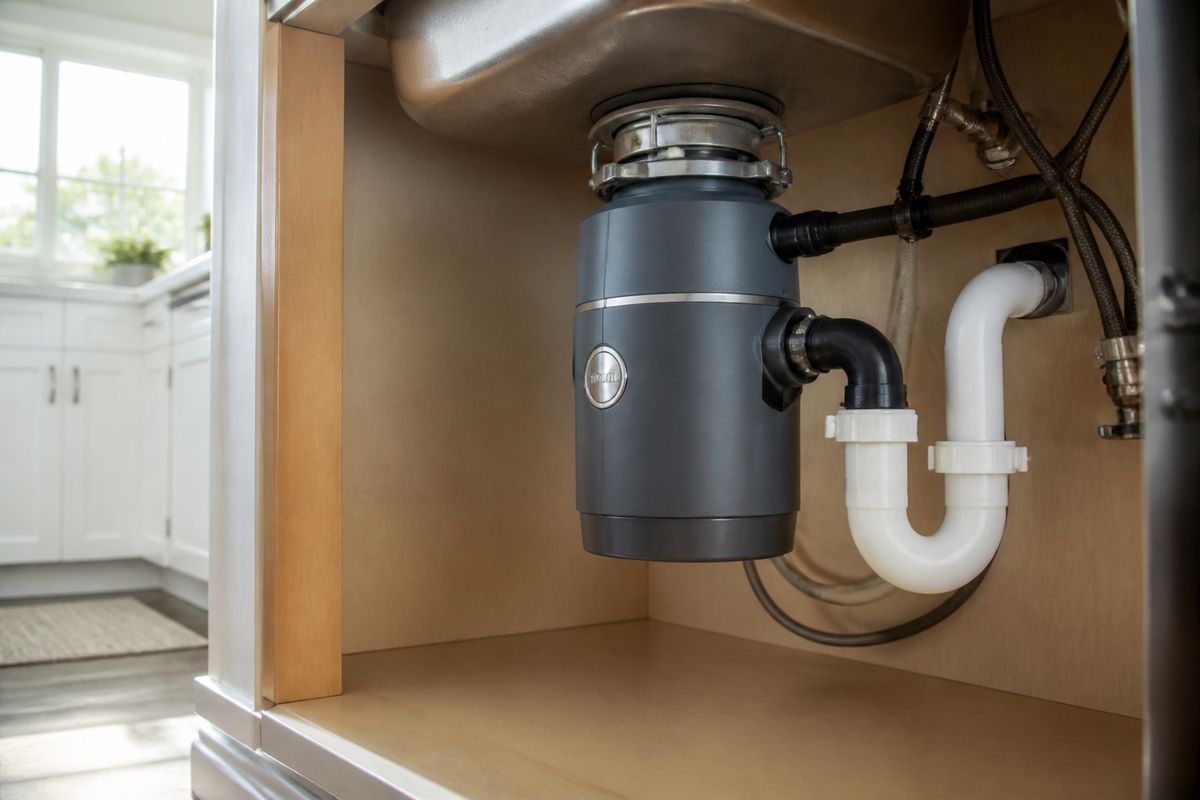
Install the drain trap and discharge pipe
Reconnect the disposal discharge tube to the drain system using the correct alignment and gaskets included in your kit. Install the discharge pipe to the required height for smooth flow into the P-trap or tailpiece system. Fit the P-trap and tailpiece connections tightly using slip-joint nuts; keep washers seated flat to prevent drips. Check that the drain line has the proper slope and doesn’t hang with sags that trap water. If your old pipe configuration doesn’t align, adjust fittings and reposition the tube rather than forcing the trap assembly into a bend.
Add an air switch if your setup uses one
Some kitchens use an air switch and special tubing instead of a standard wall switch setup. If your disposal kit includes an air switch, connect the air hose to the disposal’s air switch adapter according to the kit instructions. Verify the air switch lines are clear and properly seated—misalignment can prevent actuation. For batch-feed units, remember they operate only when the stopper cap is inserted and twisted in the sink opening; for continuous-feed units, they run from the wall switch. Keep tubing routes away from hot water lines and avoid pinch points under the sink.
Wire the Disposal and Restore Power
Connect a corded or hardwired unit correctly
Follow your disposal’s wiring type. For corded models, connect the cord to a grounded outlet rated for the disposal. For hardwired units, connect wires matching the disposal leads: ground to ground, and line/neutral to the corresponding household wires per the disposal’s instructions and wiring diagram. Use the included wire connectors/wirenuts and wrap with electrical tape only as recommended. Never connect wires by twisting alone without proper connectors. If you installed an air switch disposal, ensure the switch wiring and disposal wiring connections are complete before moving on.
Secure the electrical cover and strain relief
Before restoring power, reinstall the electrical cover on the disposal and ensure all fasteners are secure. Confirm the strain relief clamps the power cable so pulling on the wire doesn’t stress internal connections. Make sure no wires are pinched between the cover and the unit housing and that the switch mechanism leads are routed away from moving parts. Tighten strain relief components firmly by hand and with the appropriate tool, but stop when snug—over-cranking can damage the cable jacket. Clear away any tools and verify the underside wiring is neatly contained.
Test the switch and confirm startup
With the area still clear under the sink, restore power at the breaker. Then test the disposal by running water and switching it on for a brief moment. The motor should start smoothly without buzzing, grinding, or repeated trips. If your disposal has a red overload reset button on the bottom of the motor housing, press it in until it clicks after turning power off, then try again. If the unit hums but won’t spin, cut power and use a 1/4-inch Allen wrench in the hex socket on the underside to free the impeller by rotating it through a full motion, then press reset and test.
Finish, Test, and Troubleshoot
Run water and check for leaks
Run cold water and switch the disposal on briefly while observing all connections. Look for drips at the sink flange mounting seam, at the dishwasher hose connection (if installed), and around the discharge tube and P-trap joints. Wipe connections dry with a rag, then run again for another short pass so you can see fresh moisture clearly. If you see a leak at the sink flange, it usually indicates the plumber’s putty seal or mounting ring has loosened—tighten the mounting assembly evenly and reseat the gasket if needed. If water leaks from the side at the dishwasher/discharge area, it points to a hose clamp or discharge tube gasket issue that requires re-seating and tightening.
Clear jams and diagnose common startup issues
Never put your hand into the grind chamber. With power off, use tongs or pliers to retrieve dropped objects like bottle caps, fruit pits, or silverware. If the disposal is silent when switched on, let the motor cool for a few minutes, then press the red overload reset button until it clicks and try again. If a disposal hums but does not spin, cut power and use the 1/4-inch hex/Allen wrench in the center underside socket to free a jammed flywheel by moving through a full rotation. After clearing, press reset and test with water again.
Know when replacement makes more sense than repair
Replace the unit instead of repairing when the motor fails, the disposal leaks from the body/internal housing, or you see repeated clogs and jams that don’t resolve with clearing and proper use. A disposal leaking from the bottom housing indicates an internal seal failure; the safest fix is replacement rather than attempting patch work. If electrical issues keep returning—like repeated breaker trips after correct reset use—or if mounting surfaces are damaged or corroded, replacement usually restores function faster than ongoing troubleshooting. Also replace if the unit is obsolete and no longer matches your sink and drain configuration cleanly.
Frequently Asked Questions
Can I install a garbage disposal myself?
Yes, if you’re comfortable with basic plumbing and electrical safety. Always shut off power first at the breaker, verify the wires are de-energized, and follow the manufacturer’s mounting and wiring instructions exactly.
Do I need a plumber to replace a garbage disposal?
Not always. Many homeowners can replace a standard disposal themselves, but it’s a good idea to hire a plumber if the wiring is unusual, the drain layout is complex, or your sink opening and mounting configuration don’t match typical kits.
What tools are usually needed to install a garbage disposal?
Common tools include a screwdriver, adjustable wrench, plumber’s putty, a hammer and chisel for removing stubborn old fittings, and sometimes an Allen wrench to clear jams. You’ll also need a flashlight and a bucket for draining water from the trap and connections.
How do I know if my garbage disposal should be repaired or replaced?
Replace it if the motor is failing, the unit leaks from the body, or you have repeated clogs and jams that don’t improve after clearing and proper installation. Minor connection or drain issues can be repaired, but internal failures generally call for replacement.
Why does my new garbage disposal leak?
Leaks usually come from loose drain connections, an uneven flange seal, or a gasket that isn’t seated correctly. Recheck each joint, tighten mounting hardware evenly, and reseat the flange gasket if the mounting seal isn’t uniform.