GE Garbage Disposal Replacement
If your sink drains slowly, smells like rotten food, or won’t turn on at all, the problem usually comes from a failed GE garbage disposal. When it’s time for ge garbage disposal replacement, the right approach starts before you touch any plumbing—power and mounting details determine whether the job goes smoothly or turns into a mess.
For more help, see our GE Garbage Disposal Installation: Removal, Wiring, and Setup guide.
Before You Remove the Old Disposal
Confirm the problem and rule out a reset
Start by verifying the symptom and checking the disposal’s reset before you assume it’s dead. If the unit hums but won’t spin, cut power at the breaker, clear any obvious jam from the grind chamber with tongs, then let the motor cool for 5–10 minutes. Press the red overload reset button on the bottom of the motor housing (until it clicks) and switch the disposal back on. If it still won’t start, move to removal.
Shut off power, water, and the sink drain
Turn off the disposal using the wall switch, then switch off the circuit breaker feeding the outlet/disposal. Confirm the disposal is silent—flip the switch and listen. Next, stop water running at the sink and drain any water from the sink basin so it doesn’t spill into the cabinet during disconnecting.
Identify the disposal model and mounting style
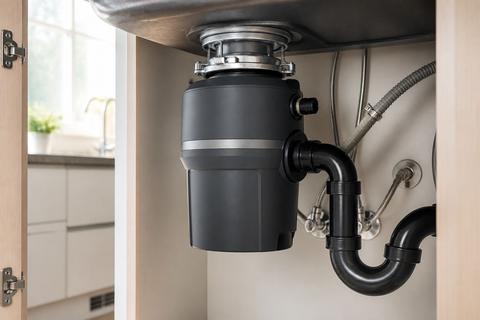
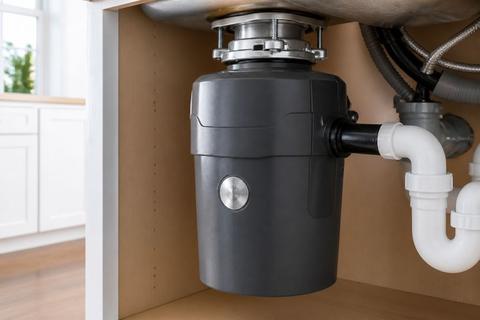
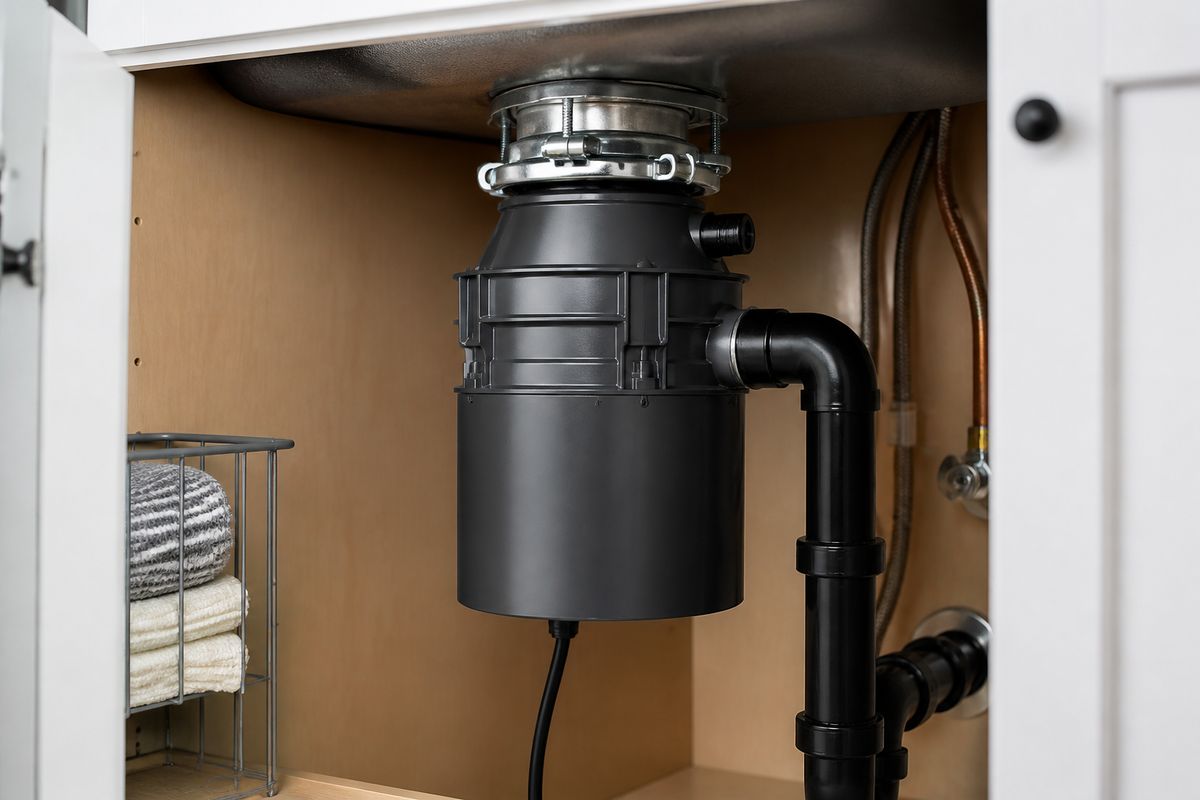
Locate the label on the underside or side of the motor housing for the model number; GE model numbers often start with GFC (continuous-feed) or GFB (batch-feed). Check whether your unit uses a standard bottom mounting ring with a sink flange (most common) and note if you have a dishwasher inlet connected by a rubber hose. Take a quick photo of the wiring and plumbing connections for accurate reassembly.
How to Disconnect and Remove the Disposal
Free the sink flange and mounting ring
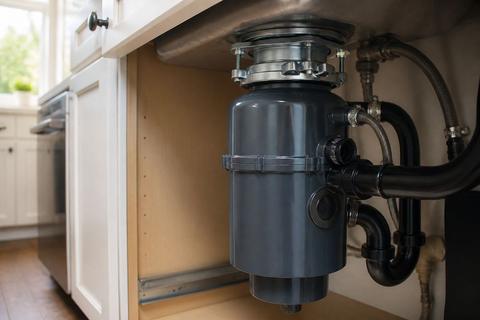
Under the sink, remove any items that block access. Loosen the dishwasher discharge connection and the disposer’s mounting bolts/clamp according to your setup. If your GE unit is held by the standard mounting system, loosen the mounting ring screws and support the disposal from below. If the flange/union is stuck with corrosion, use a penetrating lubricant and let it sit before forcing the ring.
Disconnect the dishwasher and drain connections
Disconnect the discharge pipe at the bottom outlet and separate the drain line from the disposal discharge tube. For dishwasher hookup, remove the dishwasher inlet hose connection and—if your GE disposal has an inlet that’s been used—separate the hose clamp. If there’s a plastic knockout plug in the disposal’s dishwasher inlet chamber, leave the plug in place if it was not used; otherwise remove it after you’ve opened the chamber so the dishwasher can drain through the disposer later.
Support the unit and twist it off safely
Place a block or bucket under the disposal for support while you work. Most GE disposals release by loosening the mounting ring and then twisting the unit: hold the weight, rotate to disengage the tabs, and lower it straight down. Never let the unit hang by the plumbing. Set it aside and wipe the flange area clean for the next installation.
When You’re Not Replacing It
Cap the drain opening securely
If you remove the disposal but keep the sink plumbing, cap the drain opening inside the sink to prevent sewer gases and backflow. Use a proper disposal cap/stopper assembly or threaded cap compatible with your sink opening. Ensure the cap seals tight and the drain line below remains properly connected with no gaps in the trap/pipe joints.
Remove or keep the mounting bracket
Decide based on the sink flange condition and what you plan to install next. If the existing sink flange and bracket are solid and not corroded, keep them to reduce leak risk later. If the bracket or flange is rusted, cracked, or loose, remove it now so you can reinstall clean hardware with the correct seal surface.
Deal with odors, leaks, and exposed plumbing
After removal, run cold water briefly to flush debris, then check the flange area for any signs of seepage. For odors, clean the sink drain throat and trap inlet with a degreasing cleaner, then re-seal any dry-fit joints using the correct gasket or plumber’s putty only where required by the new setup. If there’s standing water under the sink, fix the source—an exposed/loose joint must be reseated before you move on.
Choosing the Right Replacement
Match the flange, collar, and horsepower
Choose a new GE disposal that matches your existing sink flange and mounting setup, including the mounting collar size. Confirm the motor size rating; many homeowners select based on horsepower needs (low-power units for light food scraps, higher horsepower for frequent use). The most important compatibility check is the mounting system and discharge outlet alignment—not branding alone.
Check dimensions, discharge alignment, and cord type
Measure from the sink flange down to the cabinet space where the disposal will sit, including clearance for pipes and the dishwasher hose. Verify the discharge outlet location lines up with your existing discharge pipe run. Also confirm the electrical connection style: some GE disposals use a power cord kit while others use hardwire, so buy the correct version for your outlet or wiring setup.
Know when a different brand or adapter is needed
If you’re switching away from a GE unit or the mounting system doesn’t match, you may need an adapter kit for the sink flange or for the discharge connection. If the existing sink flange is damaged or the mounting ring doesn’t lock securely, replace the flange assembly rather than forcing a mismatched adapter.
Install the New GE Garbage Disposal
Assemble the mounting hardware and rubber parts
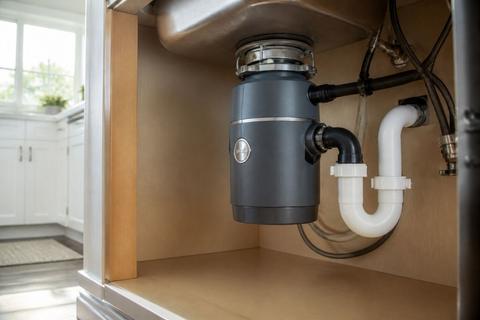
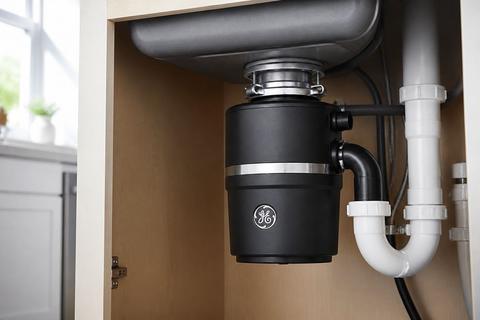
Before lifting the new unit up, install the rubber components and mounting hardware in the correct order. Set the sink flange seal/rubber gasket on the flange, insert the flange into the sink opening, then secure it from below using the mounting ring and screws. Add the disposal’s rubber splash guard and any rubber collar components as specified for your exact GE model so the unit seats without leaks and vibration.
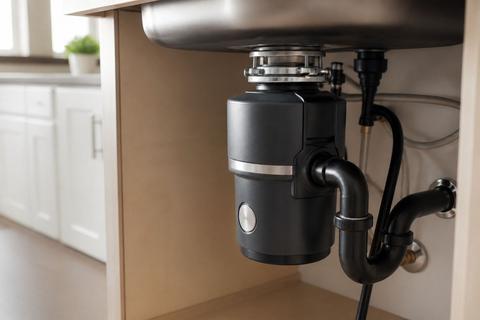
Connect the drain, dishwasher line, and power
Attach the discharge tube to the disposal outlet and connect the dishwasher discharge line. For dishwasher hookup, ensure the plastic knockout plug in the disposal’s dishwasher inlet nipple has been punched out and removed from the grind chamber first; otherwise the dishwasher won’t drain and backs up into the sink. Finally, connect power: plug in a corded unit or follow your wiring instructions for a hardwired unit, using the correct strain relief and proper grounding.
Test for leaks, vibration, and proper grinding
Turn on water, then flip the wall switch to run the disposal. Check under the sink for any active leaks at the sink flange, dishwasher hose connection, and discharge line joints. Listen for unusual rattling that indicates a mis-seated splash guard or loose mounting hardware. Grind a small amount of soft waste (like food scraps) and confirm smooth operation.
Common Problems After Replacement
Fix a disposal that hums, jams, or won’t start
If the unit hums but doesn’t spin, shut off power at the breaker. Clear any obstruction from the grind chamber with tongs or pliers—never put your hand inside. For a jammed impeller, insert a 1/4-inch Allen (hex) wrench into the hex socket on the bottom center of the disposal and rotate back and forth through a full cycle to free the plate. Then press the red overload reset button on the bottom until it clicks and retry.
Replace worn splash guards and rubber flaps
Leaks and noise after replacement often come from damaged rubber parts. Inspect the rubber splash guard and any rubber flaps for tears, hardening, or warping. Replace them so they seal the grind chamber and prevent splash-through and vibration that can loosen connections.
Know when to stop and call a plumber
Stop DIY troubleshooting and call a plumber if you find persistent leaking at the sink flange after reseating the mounting hardware, if dishwasher connections repeatedly drip or back up, or if you suspect internal electrical damage. Also call for help if the disposal trips the breaker or reset button repeatedly after clearing jams—overcurrent can indicate a deeper wiring or motor issue.
Frequently Asked Questions
How do I remove a GE garbage disposal without replacing it?
Turn off power at the breaker, disconnect the drain and dishwasher lines, and remove the unit from the mounting ring by loosening the mount and twisting it free. Cap the sink opening securely using a disposal cap/cover or install a drain basket until you’re ready for a replacement. Leave the trap and drain connections properly sealed so you don’t get sewer gas or leaks.
Do I need to replace the mounting bracket too?
Usually no if the existing mounting bracket and sink flange are intact and compatible with the new unit. Replace them if you see rust that weakens the metal, cracks, or a loose flange that won’t hold the disposal securely and can’t compress a proper seal.
Can I reuse the old rubber splash guard or drain insert?
You can reuse rubber parts only if they are still flexible and undamaged. Replace hardened, torn, or warped rubber components because they increase leaks, noise, and odors by not sealing the grind chamber correctly.
Why does my new disposal hum but not grind?
A humming disposal that doesn’t grind usually indicates a jam, improper wiring, an overload that tripped, or an overload reset that needs attention. Shut off power, clear any obstructions, press the red overload reset button on the bottom after letting the motor cool, and then restore power and try again.
Should I watch a video before replacing a garbage disposal?
Yes—watch a reputable installation video to understand the specific mounting system and plumbing layout. Use it as a visual guide, but always follow the manufacturer’s instructions for your exact GE model and wiring/connection method.